


Table of Contents
- Why Engraved Cutting Boards Need Special Care
- Daily Cleaning: Hand Washing vs. Dishwasher Safety
- Removing Food Residue from Engravings
- How to Sanitize Wooden Cutting Boards
- Drying Techniques to Prevent Warping
- Conditioning with the Best Food-Safe Oil for Cutting Boards
- Engraved Cutting Board Maintenance: Sanding and Refinishing
- Troubleshooting Mold and Discoloration
- Frequently Asked Questions
Last Updated: September 9, 2026
Why Engraved Cutting Boards Need Special Care
Cleaning engraved cutting boards requires a different approach than maintaining plain wooden boards because the recessed design creates tiny pockets where food particles, moisture, and bacteria can hide. An engraved cutting board is a personalized keepsake where the laser-etched lettering sits below the surface, making it vulnerable to damage from harsh scrubbing and improper soaking. An engraved cutting board is a personalized keepsake where the laser-etched lettering sits below the surface, making it vulnerable to damage from harsh scrubbing and improper soaking. We believe custom boards are meant to be used and passed down, so protecting both the wood and the sentimental message carved into it is important.
The common mistake is treating the engraving like a printed label. It is not a sticker or a painted surface; it is burned into the grain, which means the wood inside those letters is exposed and more porous than the surrounding surface. Generic wood care often overlooks the specific needs of engraved areas, leaving them prone to harboring residue.
Below, we will walk through daily habits, deep cleaning, sanitizing, and conditioning so your personalized board stays beautiful for years. We will also cover the material differences between bamboo and hardwood that change how you should care for each one.
Daily Cleaning: Hand Washing vs. Dishwasher Safety
Engraved cutting boards should always be hand washed with warm soapy water and never placed in a dishwasher. The high heat, prolonged moisture, and harsh detergents inside a dishwasher cause wood fibers to swell and contract rapidly, which leads to warping, cracking, and the engraving losing its crisp definition.
A dishwasher is not safe for any wooden board, but the engraved areas are especially vulnerable. The combination of heat and water can open the wood grain around the lettering, creating spaces where bacteria can settle permanently.
For daily cleaning, follow this simple routine:
- Rinse the board under warm running water immediately after use.
- Apply a mild dish soap to a soft sponge or cloth.
- Wipe the entire surface, paying gentle attention to the engraved areas.
- Rinse thoroughly to remove all soap residue.
- Towel dry immediately and stand upright to finish air drying.
Removing Food Residue from Engravings
Food residue collects in the recessed letters of an engraved cutting board because a flat cloth cannot reach into the grooves. This is where most cleaning routines fail, leaving behind invisible particles that can turn rancid or harbor bacteria. The key is to use tools that match the geometry of the engraving, not just any brush will do.
The Right Tools for Deep Grooves
Laser-etched engravings typically range from 0.5 to 1.5 millimeters in depth, depending on the wood density and laser settings (peer-reviewed research). A standard dish sponge cannot penetrate these crevices. Instead, use a soft-bristled brush with nylon or boar bristles, a clean, unused toothbrush is ideal because its bristle length and stiffness are calibrated for reaching narrow gaps without scratching surrounding wood. For wider engraved areas, a silicone-tipped brush (often sold as a "detail brush" for kitchen gadgets) offers flexibility without abrasion.
Avoid brushes with metal bristles or stiff plastic scrapers; these will gouge the wood fibers inside the engraving, creating rough spots that trap even more debris over time.
Step-by-Step Debris Removal
- Dry-brush first. Before adding water, gently sweep the brush across the engraved lines to dislodge loose crumbs and flour. This prevents them from turning into a paste when wet.
- Apply warm, soapy water. Use a mild dish soap (pH-neutral, fragrance-free) and work the brush in a circular motion along the grain of the letters, not across them. Circular motion lifts particles from the bottom of the groove.
- Rinse with a directed stream. Hold the board under a running faucet at a slight angle so the water flows across the engraving, flushing out loosened debris. Do not use a high-pressure sprayer, it can drive water deeper into the wood grain.
- Inspect under bright light. After rinsing, tilt the board toward a light source. Any remaining residue will appear as a dark line or speckle. Repeat the brush step on those spots only.
For Stubborn, Dried-On Food
If food has baked into the engraving (common after cutting roasted meats or sticky produce), create a paste of three parts fine sea salt to one part water. Apply it directly into the grooves with your fingers or the brush, let it sit for 2-3 minutes to soften the residue, then scrub gently. The salt acts as a mild abrasive that breaks down proteins without scratching the wood. Rinse thoroughly and dry immediately.
For greasy residue (e.g., from butter or oil-based marinades), use a degreasing solution of one part white vinegar to three parts warm water. Apply with a soft cloth, let it sit for 5 minutes, then brush the engraving. Vinegar cuts through oils without leaving a soapy film that can attract more dirt.
Why Engraving-Specific Cleaning Matters
Unlike plain cutting boards, engraved surfaces have a larger surface-area-to-volume ratio inside the grooves, meaning bacteria and food particles have more microscopic hiding spots. The deeper the groove, the more mechanical action needed to clean it effectively.
By using the right tools and technique, you can keep the engraving free of residue without damaging the wood.
How to Sanitize Wooden Cutting Boards
Sanitizing engraved cutting boards is different from daily cleaning because the goal is to eliminate bacteria rather than just remove visible debris. Sanitization matters most after the board has been used for raw meat, poultry, or fish, where cross-contamination is a real concern.
A common approach is to use a solution of one tablespoon of unscented chlorine bleach mixed into one gallon of water (the CDC). Apply the solution to the surface with a clean cloth, let it sit for a few minutes, then rinse thoroughly with hot water and dry immediately. This method is approved by food safety authorities and is safe for wooden boards when used correctly.
For a gentler option that is still effective, white vinegar diluted with water can be used as a natural sanitizer. However, vinegar is less effective against certain bacteria, so bleach is the more reliable choice after raw meat contact.
Drying Techniques to Prevent Warping
Proper drying is the single most important step to prevent warping and cracking in engraved cutting boards. Moisture is the enemy of wood, and how you dry the board determines whether it stays flat or begins to bow.
After washing and rinsing, towel dry the board immediately with a clean, dry cloth. Stand the board upright on its edge so that air can circulate around both faces, and allow it to finish drying completely before storing. Never lay a wet board flat on a counter, because the underside will not dry properly and moisture will be trapped.
Do not place a wooden board near a heat source, in direct sunlight, or in a dish rack to dry. Rapid, uneven drying causes the wood to shrink at different rates, which leads to warping. Air drying at room temperature is the only safe method.
Conditioning with the Best Food-Safe Oil for Cutting Boards
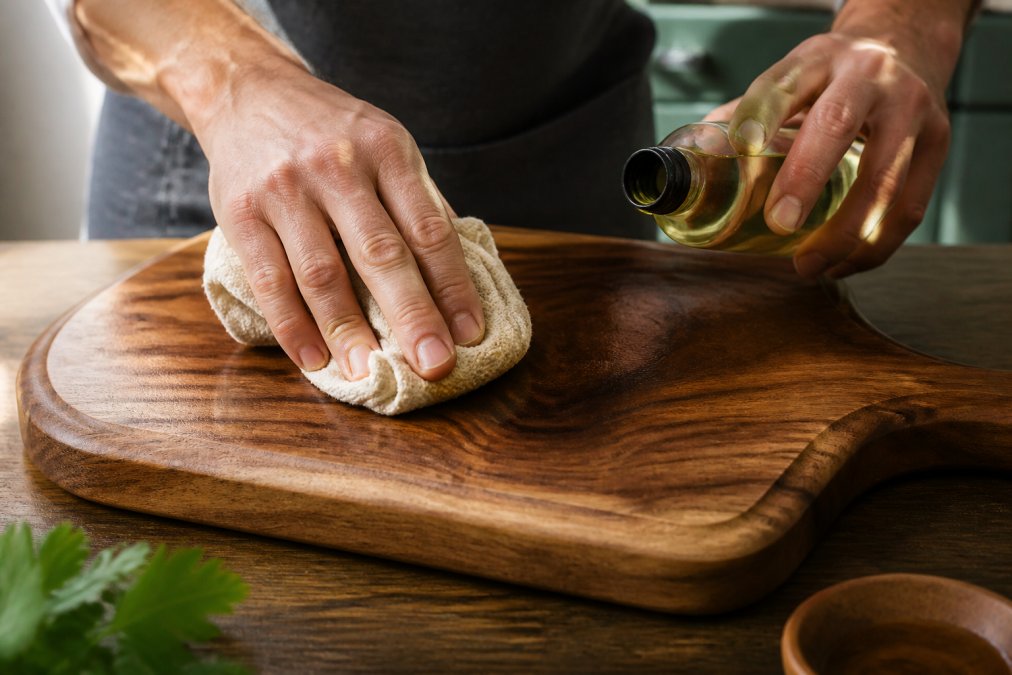
Conditioning is what keeps the wood hydrated, prevents cracking, and protects the engraved design from absorbing moisture and odors. The best food-safe oil for cutting boards is food-grade mineral oil, which is colorless, odorless, and does not go rancid over time. But the right oil is only half the equation, how you apply it, and how your board's wood type responds, matters just as much.
Why Engraved Areas Need Extra Oil
The laser-etching process burns away the wood's natural protective oils and opens the pores in the engraved lines. This makes the recessed areas more absorbent than the surrounding surface. Without regular oiling, these grooves dry out faster, become brittle, and are more likely to crack or split, especially in low-humidity climates. Oiling the engraving creates a hydrophobic barrier that repels water and food juices, making future cleaning significantly easier.
Hardwood vs. Bamboo: Different Needs
Not all cutting boards respond to oil the same way. Here is how to tailor your conditioning routine:
- Hardwoods (maple, walnut, cherry, oak): These dense woods have tight grain structures that absorb oil slowly. Apply a generous layer and let it sit for 4-6 hours, then wipe off excess. Hardwoods benefit from a monthly oiling schedule with regular use.
- Bamboo: Bamboo is a grass, not a wood, and it has a different cellular structure that is naturally more water-resistant but also more prone to drying out and splitting if neglected. Bamboo absorbs oil faster but also loses it faster. Oil bamboo boards every 2-3 weeks with a lighter coat, and let it absorb for only 1-2 hours before wiping.
- Exotic hardwoods (teak, acacia): These contain natural oils that make them more water-resistant. They need less frequent oiling, every 6-8 weeks is usually sufficient, but they still benefit from a light coat to keep the engraving from drying out.
The Best Food-Safe Oils: What to Use and What to Avoid
Food-grade mineral oil remains the gold standard because it is highly refined, colorless, odorless, and does not polymerize or go rancid. It is also the only oil that the FDA explicitly lists as safe for repeated food contact under 21 CFR 178.3620 (ecfr.gov). For engraved boards, mineral oil penetrates the recessed lettering more effectively than thicker oils because of its low viscosity.
| Oil Type | Food Safe | Goes Rancid | Best For | Notes |
|---|---|---|---|---|
| Food-grade mineral oil | Yes | No | Standard maintenance | FDA-approved; penetrates deeply |
| Beeswax conditioner | Yes | No | Sealing and shine | Creates a harder surface layer; use after mineral oil |
| Coconut oil | Yes | Yes | Occasional use only | Solid at room temp; can turn rancid in warm climates |
| Olive oil | Yes | Yes | Avoid for long-term care | Goes rancid quickly; leaves sticky residue |
| Walnut oil | Yes | Yes | Rarely recommended | Nut allergen risk; goes rancid |
| Tung oil | No | No | Not for cutting boards | Contains solvents; not food-safe |
How to Apply Oil to an Engraved Board
- Clean and dry the board completely. Any moisture trapped under the oil will cause mold or warping.
- Apply oil liberally with a soft cloth. Work in the direction of the wood grain, not across it.
- Focus on the engraving. Use a cotton swab or soft-bristled brush to work oil directly into the recessed letters. This ensures the grooves are saturated.
- Let it absorb. For hardwood, wait 4-6 hours; for bamboo, 1-2 hours. If the board looks dry after this time, apply a second coat.
- Wipe off excess. Buff the surface with a clean, dry cloth until no oily film remains. Leaving excess oil on the surface can attract dust and create a sticky residue.
The Beeswax Finishing Layer
For added protection, especially on boards used for raw meat, apply a beeswax and mineral oil blend (often sold as "cutting board cream" or "butcher block conditioner") after the oil has absorbed. Beeswax creates a semi-hard protective layer on the surface that fills micro-cracks and makes the engraving more resistant to staining. It also gives the board a satin sheen that highlights the engraved design. Reapply the beeswax layer every 2-3 oiling cycles.
By matching your oiling routine to your board's specific wood type and paying extra attention to the engraved grooves, you extend the life of both the wood and the personalized design.
Engraved Cutting Board Maintenance: Sanding and Refinishing
Over years of use, even a well-cared-for engraved cutting board will develop knife marks, stains, and a worn appearance. Engraved cutting board maintenance includes light sanding to restore the surface, but this must be done carefully so the engraving is not erased.
For superficial scratches and stains, use fine-grit sandpaper with a grit of 220 or higher. Sand gently in the direction of the wood grain, working only on the flat surface and avoiding the engraved lettering. The goal is to smooth the surface, not to remove significant material.
When the engraving itself has become faded or rough, sanding the entire board evenly can refresh the look. Sand the whole surface, including the engraving, with fine-grit paper until the wood feels smooth. Then re-oil the board thoroughly, as sanding opens the wood pores and removes the previous protective layer.
Troubleshooting Mold and Discoloration
Mold on a wooden cutting board appears as dark spots or a musty odor and is almost always caused by moisture being trapped in the wood. Discoloration can also result from food residue left in the engraving or from reactive foods like beets and berries staining the grain.
If you spot mold, act quickly. Wash the board with warm soapy water, then apply a solution of one part white vinegar to four parts water to kill the mold spores. Let the solution sit for several minutes, rinse thoroughly, and dry completely. For stubborn mold that has penetrated the surface, light sanding with fine-grit sandpaper will remove the affected layer, followed by a fresh coat of mineral oil.
Discoloration from food is typically cosmetic and not a safety concern. Stains in the engraving can often be lifted by applying a paste of baking soda and water, letting it sit, then gently scrubbing with a soft brush. If the stain persists, sanding and re-oiling will usually restore the board's appearance.
Caring for a personalized cutting board takes a few extra minutes compared to tossing it in the dishwasher, but that effort protects both the wood and the meaning behind the gift. We believe a custom engraved board should be used daily, not hidden on a shelf, and proper maintenance makes that possible. CJmart offers products designed and assembled in the USA with care, and we stand behind every order with a 100% customer satisfaction guarantee. Shop Now and give a gift that will still be on the counter, looking beautiful, years from now.
Frequently Asked Questions
How do you clean an engraved cutting board without damaging the design?
Hand wash your engraved cutting board with warm water and a mild dish soap. Use a soft sponge or cloth, avoiding abrasive pads that can scratch the surface and fade the engraving. For food residue stuck in the grooves, use a soft-bristled brush. Rinse with warm water and dry immediately with a towel. Never soak the board or place it in the dishwasher.
What is the best food-safe oil for engraved wooden boards?
Food-grade mineral oil is the standard choice for engraved cutting boards. It is odorless, tasteless, and will not turn rancid. You can also use a specialized butcher block oil or a beeswax conditioner for a more protective finish. Apply a generous coat with a soft cloth, let it absorb for a few hours, and wipe off any excess.
How often should you oil an engraved cutting board?
Oil your engraved cutting board once a month with regular use. If the wood looks dry, feels rough, or the engraving appears faded, it is time to condition it again. A simple test: place a drop of water on the surface. If the water beads up, the board is well-conditioned. If it soaks in immediately, the board needs another coat of oil.
Can you sanitize an engraved wooden cutting board after cutting raw meat?
Yes. After washing with warm soapy water, you can sanitize the board with a solution of one tablespoon of unscented chlorine bleach mixed with one gallon of water. Pour the solution over the surface and let it stand for a few minutes. Rinse thoroughly with hot water and dry completely with a towel.


