


Table of Contents
- Start With a Single Statement Initial Ring
- How to Stack Rings for Beginners: The 2:1:1 Rule
- Mixing Gold and Silver Jewelry Tips for Initial Rings
- Choosing Fonts, Letters, and Personalization Details
- How to Clean Gold Initial Rings and Keep Them Tarnish-Free
- Styling Initial Rings for Everyday Wear and Special Occasions
- Frequently Asked Questions
Last Updated: September 11, 2026
Start With a Single Statement Initial Ring
The most common mistake with personalized initial rings for women is treating them like a full jewelry collection from day one. Start with one piece.
A single initial ring worn alone reads as intentional. This approach works best because it lets the ring itself become the focal point rather than getting lost in a crowded hand.
Begin with your own initial on a band that fits your dominant hand's ring finger. Wear it alone for a week, noticing how it feels during daily tasks and whether the weight is comfortable. This trial period tells you more than any style guide can.
Once that single ring feels right, you have a baseline for stacking.
How to Stack Rings for Beginners: The 2:1:1 Rule
The 2:1:1 rule is a simple framework for how to stack rings for beginners: two thin bands, one medium band, and one statement piece. This ratio creates visual balance without overwhelming your hand.
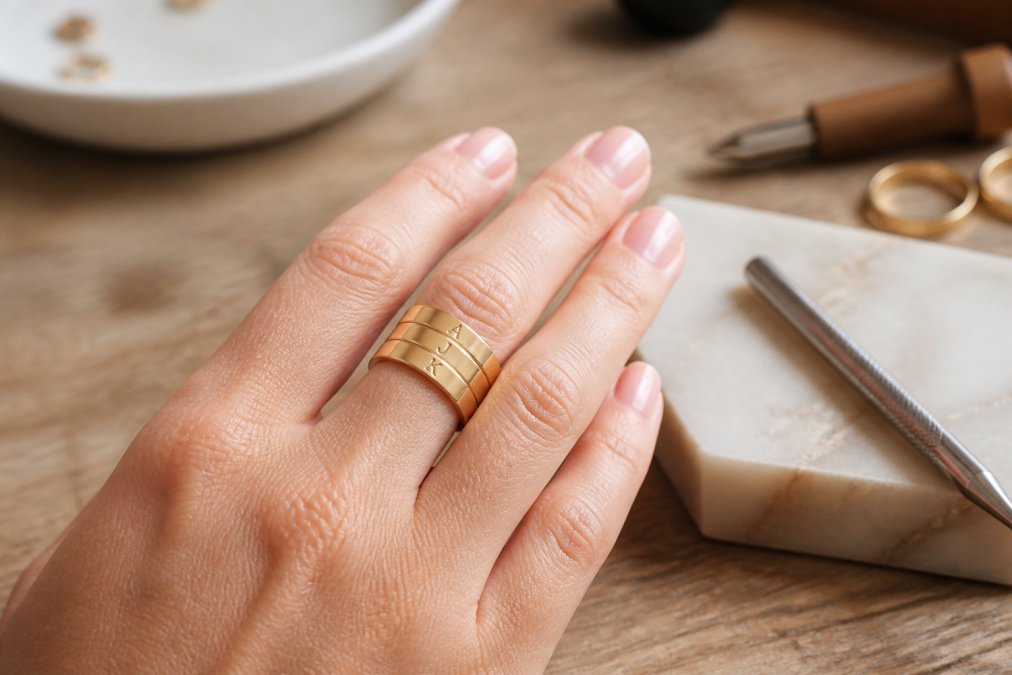
Here's how it works in practice:
- Two thin bands form your base. Keep them delicate so they don't compete.
- One medium band adds visual weight, often where your primary initial sits.
- One statement piece anchors the stack, such as a signet ring or a wider band with a prominent engraved letter.
A common mistake is stacking rings of identical width, the result looks flat. Vary your textures too: mix a polished band with a brushed finish, or a plain band with subtle detailing. The 2:1:1 approach works because odd numbers and varied proportions feel more natural to the eye than perfectly matched sets.
The Mechanics of How Bands Sit on a Finger
Most stacking advice stops at aesthetics. What actually determines whether a stack feels good is finger anatomy.
A finger is not a cylinder. It tapers from the base toward the knuckle, so bands slid toward the base sit on a narrower circumference than they were sized for. That's why a ring that fits perfectly alone can feel loose at the bottom of a stack and tight at the top.
Three variables control how a stack behaves:
- Band width. Total stack width is the sum of every band plus the gaps between them. A four-ring stack of 2 mm bands occupies roughly 8 mm of finger length before spacing (gia.edu).
- Band profile. Flat bands sit flush against each other and the skin. Domed or comfort-fit bands have a rounded interior that reduces contact area, so they slide more freely.
- Finger length. Longer fingers carry wider stacks without looking crowded. Shorter fingers look better under 6 mm total width.
A practical rule: keep the total width of a daily stack to roughly one-third of the length of your finger from base to knuckle. That keeps the stack from creeping past the knuckle line where it starts to interfere with bending.
Ring Sizing for Stacking: Why Half Sizes Matter
Ring sizing for stacking requires more precision than sizing a single ring, because each band needs to fit slightly differently than it would alone.
The ring closest to your knuckle should fit snugly; rings stacked above it need a bit more room. Half sizes matter here, sizing up by a half size for the upper rings often solves the tightness. Get sized at the end of the day when fingers are at their largest, and if you're between sizes, go up rather than down.
Which Finger, Which Stack
Placement changes how a stack reads, and different fingers tolerate different widths.
- Ring finger. The traditional home for a statement initial, and where the full 2:1:1 build works best.
- Index finger. Good for a single bold initial or a two-band stack; a full four-ring stack can look busy.
- Middle finger. The longest finger, and the one that can handle the most width.
- Pinky finger. Best kept to one or two very thin bands.
- Thumb. Uncommon for initial rings and generally reserved for a single wide band.
A common pattern is to anchor the main stack on the ring finger of the dominant hand and add a single midi ring on the index or middle finger of the other hand.
Mixing Gold and Silver Jewelry Tips for Initial Rings
Mixing gold and silver jewelry tips often focus on outdated rules about matching every metal in your outfit. Modern styling embraces contrast, a gold initial ring next to a sterling silver band looks deliberate when done with intention.
The key is repetition. Repeat each metal at least twice across your stack or overall look. One gold ring among four silver pieces looks like a mistake; two gold and two silver looks like a choice.
Gold vermeil offers a middle ground: sterling silver with a thick gold layer measured in microns, not the thin plating of costume jewelry. Rose gold sits between yellow gold and silver in warmth, making it a natural bridge. Consider your other jewelry too, if you wear a silver watch daily, one silver band in your stack creates cohesion. The goal isn't perfect matching; it's intentional contrast.
Match Metals to Your Skin Tone
Skin tone and metal matching isn't about strict rules, it's about which metals flatter different undertones. Warm undertones (yellow or peach) often suit yellow and rose gold; cool undertones (pink or blue) gravitate toward silver and white gold; neutral undertones can wear anything (the American Academy of Dermatology).
A quick test: greenish veins on your inner wrist suggest warm undertones, bluish veins suggest cool, and if you can't tell, you're likely neutral. Personal preference overrides any guideline.
For initial rings, consider how the metal affects your engraved letter. Yellow gold provides warm contrast against most skin tones, making initials stand out; silver and white gold create a cooler, more subtle effect.
Choosing Fonts, Letters, and Personalization Details
Font choice transforms an initial ring from generic to personal. Script fonts feel romantic and work well for single initials where letterforms can flow. Block letters read as modern and clean, suited to minimalist stacks. Serif fonts add a classic touch.
Beyond the font, consider these personalization options:
- Single initial vs. multiple letters: One letter makes a bold statement. Two or three letters (like a monogram) add complexity but require more space.
- Engraved vs. raised: Engraved letters sit flush with the band for a subtle look. Raised letters catch light and draw more attention.
- Inside engraving: Many rings allow a hidden message or date inside the band. This adds sentiment without affecting the exterior design.
- Birthstone accents: Some designs incorporate a small birthstone alongside the initial, combining two personal elements.
When ordering custom pieces, requesting a preview or mockup before production can let you see how the letterforms look in your chosen font before the ring is made.
How to Clean Gold Initial Rings and Keep Them Tarnish-Free
Knowing how to clean gold initial rings properly extends their life and keeps engraved details sharp.
For routine cleaning, mix a few drops of mild dish soap with warm water (jewelers.org). Soak the ring for 10-15 minutes, scrub around the engraving with a soft-bristled toothbrush, then rinse and pat dry with a lint-free cloth.
Avoid these common cleaning mistakes:
- Harsh chemicals: Chlorine, bleach, and ammonia can damage gold alloys and weaken settings over time.
- Abrasive materials: Paper towels and rough cloths can scratch polished surfaces. Use microfiber or jeweler's cloth.
- Ultrasonic cleaners: These work for plain bands but can damage rings with stones or delicate engraving.
For sterling silver, tarnish is the primary concern, silver reacts with sulfur compounds in the air. Store pieces in airtight bags with anti-tarnish strips to slow this. Gold vermeil requires gentler handling: stick to the soap-and-water method and avoid polishing cloths designed for solid gold.
Daily Care Habits That Prevent Damage
Small habits make the biggest difference in how your rings age.
Put jewelry on last when getting ready, letting lotions and perfumes absorb fully first. Take rings off first when getting undressed to prevent snagging. Store each piece separately, rings tossed together in a dish scratch each other. Remove rings before gripping or heavy lifting, since pressure can warp thin bands and loosen stones.
Styling Initial Rings for Everyday Wear and Special Occasions
Everyday styling for initial rings leans toward simplicity. A stack of two or three delicate bands works for office settings, errands, and casual outings, keep total width under about 8 mm.
For special occasions, add a statement piece to your existing stack. A signet ring or wider band with a prominent initial elevates the look without a complete change. Most people wear their main stack on the ring finger of their dominant hand, while midi rings above the knuckle work well on index or middle fingers.
Layering with other jewelry follows the same principle as mixing metals: repetition creates cohesion. If your stack features gold, echo that in your earrings or necklace, not matching sets, just a shared element.
The Everyday-to-Occasion Transition
The mistake most people make is treating everyday and occasion styling as two separate wardrobes. The strongest approach is a single core stack modified with one swap:
- Workday. Two thin bands plus one medium band with your primary initial, around 6 mm total.
- Weekend. Swap the medium band for a wider one, or add a thin band with a second initial. Stay under 8 mm.
- Evening or event. Add the statement piece, a signet or wider engraved band, on top of the core stack.
The one-swap rule keeps your signature look recognizable. A stack that changes completely from day to night reads as two different people's jewelry.
Placement Rules That Actually Hold Up
Hand placement is where most guides get vague. A few concrete patterns work reliably:
- Dominant hand, ring finger. The default home for a main stack.
- Non-dominant hand, index finger. Good for a single bold initial or a two-band stack.
- Midi rings. These sit above the knuckle and work best as a single thin band. Midi sizing fits the upper phalanx, typically one to two sizes smaller than the base of the same finger.
- Multiple fingers. If you wear rings on more than two fingers, keep each stack to one or two bands.
A useful check: hold your hand flat and look from the side. If any stack extends past the knuckle line, it's too wide for that finger.
Gifting: What Makes an Initial Ring Land
Initial rings work as gifts because the personalization does the emotional work, but the details determine whether the gift feels considered.
- Mother's rings. Multiple initials or birthstones on one band, one per child, usually in birth order.
- Milestone markers. A single initial with a date engraved inside the band, a wedding date, graduation year, or birth date.
- Friendship or sibling sets. Two or three matching bands, each with one person's initial.
- Self-purchase. The most common use case: a single initial on a band worn daily, often marking a personal milestone.
When gifting, sizing is the hardest part. If you don't know the recipient's ring size, a midi ring or adjustable band is safer than a standard-sized ring. Most jewelers resize solid gold or sterling silver once for free or a small fee, but gold vermeil and plated rings generally can't be resized without damaging the finish.
Frequently Asked Questions
What is the 2:1:1 rule for stacking initial rings?
The 2:1:1 rule means wearing two thin bands, one medium band, and one statement piece on a single finger. This creates visual balance without overcrowding. For personalized initial rings, use your letter ring as the statement piece, then flank it with two delicate stacking bands and one midi ring. The ratio keeps the eye moving and prevents the stack from looking cluttered or heavy on your hand.
Can you wear initial rings on any finger?
Yes, initial rings work on any finger, but placement changes the look. The index finger suits bold signet rings and statement letters. The middle finger handles wider stacks well. The ring finger is traditional for sentimental pieces and works for dainty, minimalist designs. Pinky and thumb rings give an edgy, fashion-forward feel. Midi rings sit above the knuckle for a subtle detail. Try different placements to see what feels natural for your hand shape.
How do you mix metals when wearing personalized rings?
Mix metals by choosing one dominant tone and adding accents. If your initial ring is gold vermeil, add one sterling silver or rose gold band as a contrast piece. Keep the ratio around 70 percent dominant metal and 30 percent accent metal. Repeat one metal at least twice in your stack so the mix looks intentional. Textured bands, such as hammered or twisted designs, help bridge the color difference between gold and silver.
What is the best way to clean personalized initial rings?
For gold vermeil and sterling silver initial rings, use warm water with a drop of mild dish soap. Soak for two to three minutes, then scrub gently with a soft-bristle toothbrush, paying attention to the engraved letter where tarnish builds up. Rinse and dry with a lint-free cloth. Avoid ultrasonic cleaners on vermeil because they can strip the gold layer. For rose gold pieces, skip abrasive polishes and use a jewelry polishing cloth instead.
Finding jewelry that feels personal without looking mass-produced is harder than it should be. CJmart offers personalized initial rings and keepsakes designed to mark the moments that matter, with most products assembled in a USA factory and free shipping on orders over $70. Every piece comes with a 100% customer satisfaction guarantee. Get started with CJmart and give a gift that carries meaning long after the occasion passes.


